Welcome to my blog !

We kicked started Beauty Week with the basic gel manicure workshop conducted by The PinkRoom International at 2pm!

It was a very small class of 5 but because of it, all of us managed to really get 1-on-1 experience with our instructor and the overall atmosphere was that of fun and laughter.
Minghui from The PinkRoom International giving us a brief presentation on the school and their various courses


The course officially began and our instructor, Jolene, taught us the difference between gel nail polishes and normal nail polishes. Did you know that gel polishes do not dry out when exposed to air? That is why bottles of gel polishes can last for decades! Gelish is just the brand of gel nail polishes so there's no difference between Gelish and all other gel nails with exception to types of pigments and whether it's a 1-step or 3-step process.
Showing us the consistency of gel polishes
Gel polishes are also naturally more viscous compared to normal nail varnish and for this particular brand, the pigments used are organic and it's only a 1-step gel polish. In other words, no need for base  or primer! Moreover, gel polishes do not stain the nails as the pigments do not get absorbed by the nails after curing under a UV or LED lamp.


Now, onto proper nail care. A lot of us think that gel polishes are bad for the nails but according to both Jolene and Master Educator, Joe Chua, it is actually the knowledge of your nailist and technique. So...let's get a bit educated.

First: Nails are like hair. They're not 'alive'. There's no real need to let them 'breathe' as such but of course, healthy nails are also an indication of personal health. Which is why The PinkRoom kept emphasising on how to care for your nails by first removing the cuticle with a pumice stone if you're not confident to use the metal ones. It's gentle and it is exactly like how you'd remove dead skin from your feet. This also helps to set the nail clean for the gel polish to adhere properly onto your nail bed. They do not recommend using nail files to buff the nails, which is what most manicurists would do to prime your nails for the gel polish. Instead, use a gentle buffer and this would not thin down your nails.

In fact, as emphasised by Joe, a proper manicurist would be buffing away the base coat from your previous gel manicure during this process. If your nails did not have a previous gel manicure, all the more the manicurist should be using a gentle buffer rather than a file.

Soon, we were taught how to apply the layers of gel polish and to cure them in the lamp. LED lamps cure a lot faster than UV lamps and a lot of people prefer LED lamps over UV lamps thanks to all the articles written about UV exposure.

For today's workshop, we were taught how to draw a penguin! We could choose our preferred base colour of our penguin before we went back to our seats to DIY.
Check it out! All of our different penguins! There's an extra pig because I had more time and wanted another animal. LOL.
Master Educator, Joe Chua, doing an acrylic nail demonstration
After we were all done with our penguins, Master Educator, Joe Chua, came in to do an acrylic nail demo. Acrylic nails are considered to be one of the most difficult to do and the nailist's technique can be easily seen from the end product due to the thickness and shaping. Moreover, Joe decided to do a French Tip, which is a classic but also very difficult as the 'smile' of the nail has to be perfect. To show his skill, Master Joe did not use a fake stick-on but a form fitting acrylic.

Sticking on the guide for the acrylic nail. Photo courtesy of PinkRoom

Master Joe explaining to us why acrylic nails aren't that popular
Acrylic nails last very long but they're the least popular among all the various types of nails because it requires a highly skilled nailist to be able to do perfect ones. Thus, the regular manicurist out there will not be able to shape the acrylic nails such that they look natural and may crack easily too.


The finished acrylic nail! Doesn't it look natural? It's the fastest manicure that I've ever gotten too!

Master Joe also mentioned that another reason why acrylic nails aren't popular is because other manicurists tend to overfile the nail before soaking it in acetone to remove. Once again, it is important to find a manicurist who has been trained properly. This is why The PinkRoom prides itself in being one of the few nail schools in Singapore to be able to give their students a proper diploma once they have finished their nail courses!

After the workshop, it was time to shop as The PinkRoom is now having a Clearance Sale!


To know more about The PinkRoom, you can visit their Facebook page https://www.facebook.com/PinkRoomNails.PRINA/ or visit their shop at:

10 Anson Road
#06-18 International Plaza

They open:
Mon-Fri:
11:30-21:30
Sat:
11:30-18:00


So...I'm finally back on the nail painting bandwagon now that I'm back in Singapore. I'm trying out the new polishes that I bought from the US! I really restrained myself. Although I couldn't help but get 3 bottles of Sally Hansen Miracle Gel as it cost me only US$8.90+ (about S$12) when it sells for S$16 here. I also bought my first Essie nail polish in 'On a silver platter' for about US$8 as well.

Anyway, the polishes I used above are Sally Hansen "Flash-ionista" for the base and for the accent nail, I used the Essie polish.

I must say that I was a bit disappointed with the "Flash-ionista". Looked way better in the bottle and they didn't have swatches in the store. :(

Decided to go for something like looks simple but involved me taking out several tools. Why?
1. Stamp
2. Stamper
3. Polish spreader thing
4. Cotton bud with nail polish remover to clean stamp
5. Sticker
6. Stick to carefully remove sticker
7. 5 bottles of polishes - Sally Hansen's miracle gel in Coral and Nude and its top coat; white polish and normal top coat

It's really not difficult to do these nails. The hardest part is really the stamping but I think it's overall quite cute! Supposed to last for 2 weeks. I know. I'm getting very busy and tired to change my nail designs every week now.
I had bought a pack of NCLA Hello Kitty Nail Wraps a couple of months back and I decided to finally put them to use. They were not cheap...at about $24 for 24 sticks. That's $1 a sticker! With a small nail file.

I decided not to do all the nails with the wraps so for the other 3 fingers, I used a Chanel red as a base colour before layering on OPI's Bearest Of Them All from the Coca-Cola bear series.

NCLA has a whole Hello Kitty range and ALL of them are adorable! I decided to go with this faceless kitty chan with white and black as the base. Honestly, I think that the wraps that I bought from Hello Kitty itself (you can see my previous Hello Kitty ribbon nail design here) was a lot thinner and easier to use. I'm now wondering whether my previous fears about the removal of these stickers will come true. Well, this will determine whether I'll buy another set of nail stickers from NCLA again.

Besides the fact that these nail wraps are so darn cute, I used them also because of a very common reason: I'm just too busy! I wanted a quick manicure design that was cute but effortless. After doing them though...I couldn't help but wonder whether it was worth the lack of effort. I still managed to get some creases under the wrap and it didn't fit my nail perfectly. I made up for it by using my nail dot pen and colouring in the uncovered spaces.

One day I shall attempt to do all these designs without the use of nail wraps! But first...let's use up said wraps.

Decided to get all floral for Easter week (or octave, technically) so I bought a couple of acrylic paints and drew on watercolour flowers onto my nails. This is the 1st time I'm trying this out and I'm quite pleased with the results. I need more paintbrushes though and I do need to thin the paint down a little more.

A lot of YouTube tutorial videos recommend using a brush to soak up the excess water so as to get that watercolour effect. I've found that using a cottonbud gives you the same effect AND you need not resoak your brush into paint for the next flower.

I did my highlight nails in 1 coat of Ciate's Peppermint followed by 1 coat of OPI's What's With The Cattitude. Why did I do this? Well...I wanted to get a Tiffany blue. Anyway, back to the whole nail design. I'm really happy with it and I will get a tinge of sadness next week when it's time to do another design. Nonetheless, it's always fun to have several designs so do stay tuned!
Remember this set that I bought last year? I finally used 2 of the nail stickers last week for my Spring inspired nails:

I've always been a bit hesitant with nail stickers because my previous encounter with them was not the best. However, these proved to be a lot thinner and malleable compared to the previous ones that I've used before. Hence, there were no odd lines or lumps when I smoothed it onto my nail. Nonetheless, it's not the easiest thing to put onto my nails because I accidentally tore a slight hole into the sticker when removing it from the plastic. Oops.

I just realised that the set only gives 2 sizes of 1 design...so one of my hands had to use the smaller sticker! Not perfect. Oh wells...

Another thing about using these more expensive nail stickers was that it was true to the instructions - the stickers did remove easily with nail polish remover. Although it came out in slightly gooey bits that required a rinse under the tap afterwards.

Guess that nail stickers really are the way if you are too busy to paint your nails every week or can't afford to do monthly gel/gelish manicures or would like funky designs that are humanly impossible to draw on.
A photo posted by melfann (@melfann) on

Back to nail designs after a 1.5 week hiatus because I injured my finger thanks to my dog.
I know that it's the year of the Goat but instead of having motifs of goat/ram/sheep, my obsession for this year turned out to be Cherry/Peach blossoms.

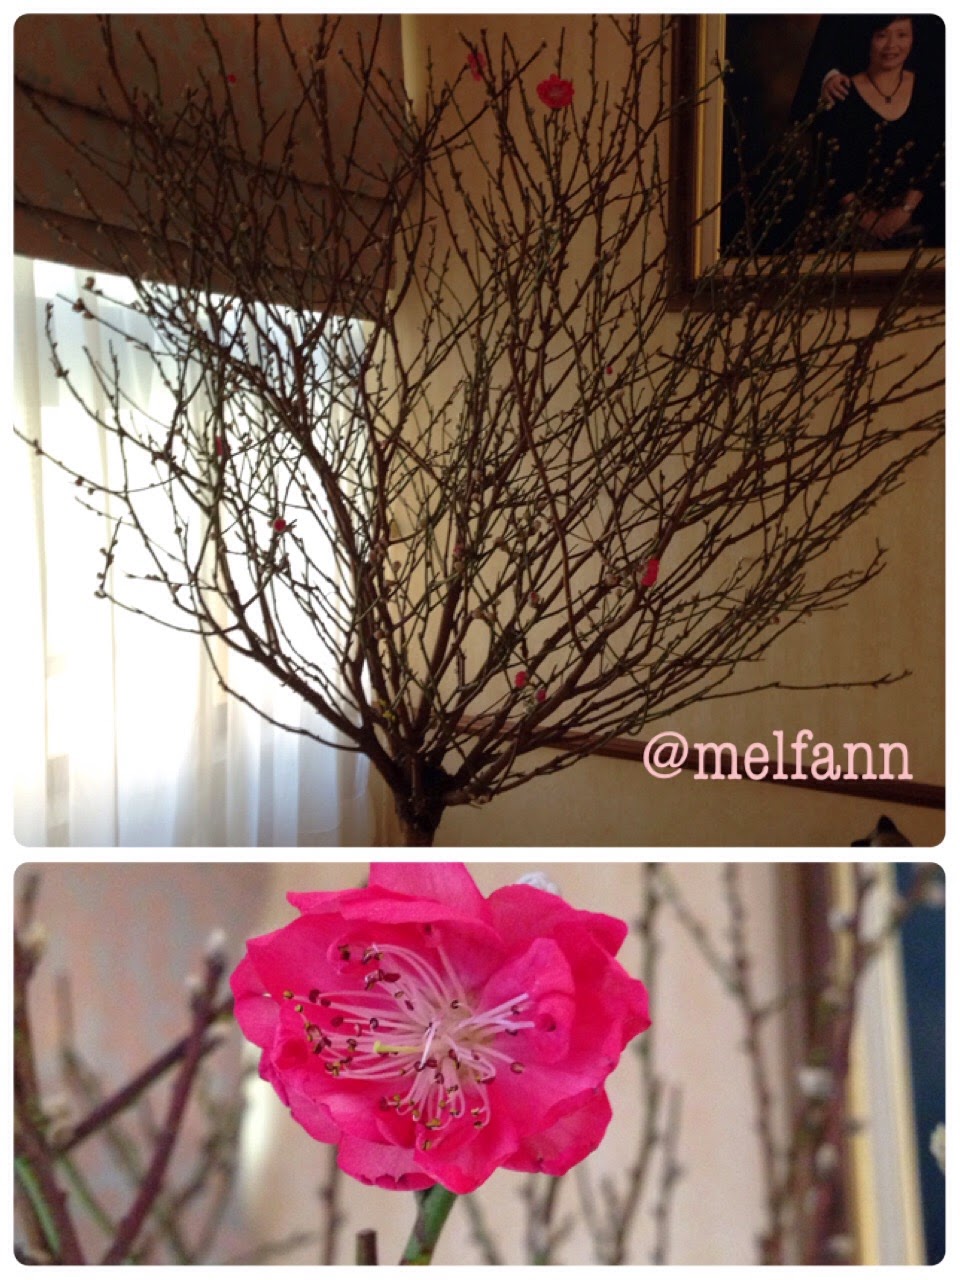
It first started out with the wreath that I made as a decoration for my front door. As you can see, it's full of (what I think are) cherry blossoms but they could've been peach blossoms for all I know. Then, I went on to buy a Peach Blossom tree for S$238.

I have been wanting a cherry blossom/ peach blossom tree in my flat for Chinese New Year since last year and this year, I finally made my parents drive me down to the nursery to buy it. I took a photo of the tree everyday for the past 10 days and you can see the video below:


The blossoms were really gorgeous when fully bloomed and I joked with my family and friends that hopefully, I will get some proper 桃花运with this Peach Blossom tree. Romeo, Romeo, where for art thou?

Anyway, the obsession continues on with my nails...
Those blossoms and branches were painted by yours truly and I must say that I impressed myself because I was scared that I would mess up the branches since my brushwork isn't very good. Guess it's getting better and probably most suited to drawing branches. A colleague found a design where the base was baby blue and the cherry blossoms had white petals. Perhaps I shall do that design for next week.

Nonetheless, it is the year of the Goat and here's me wishing everyone 羊年快乐,三羊开泰,喜气羊羊!


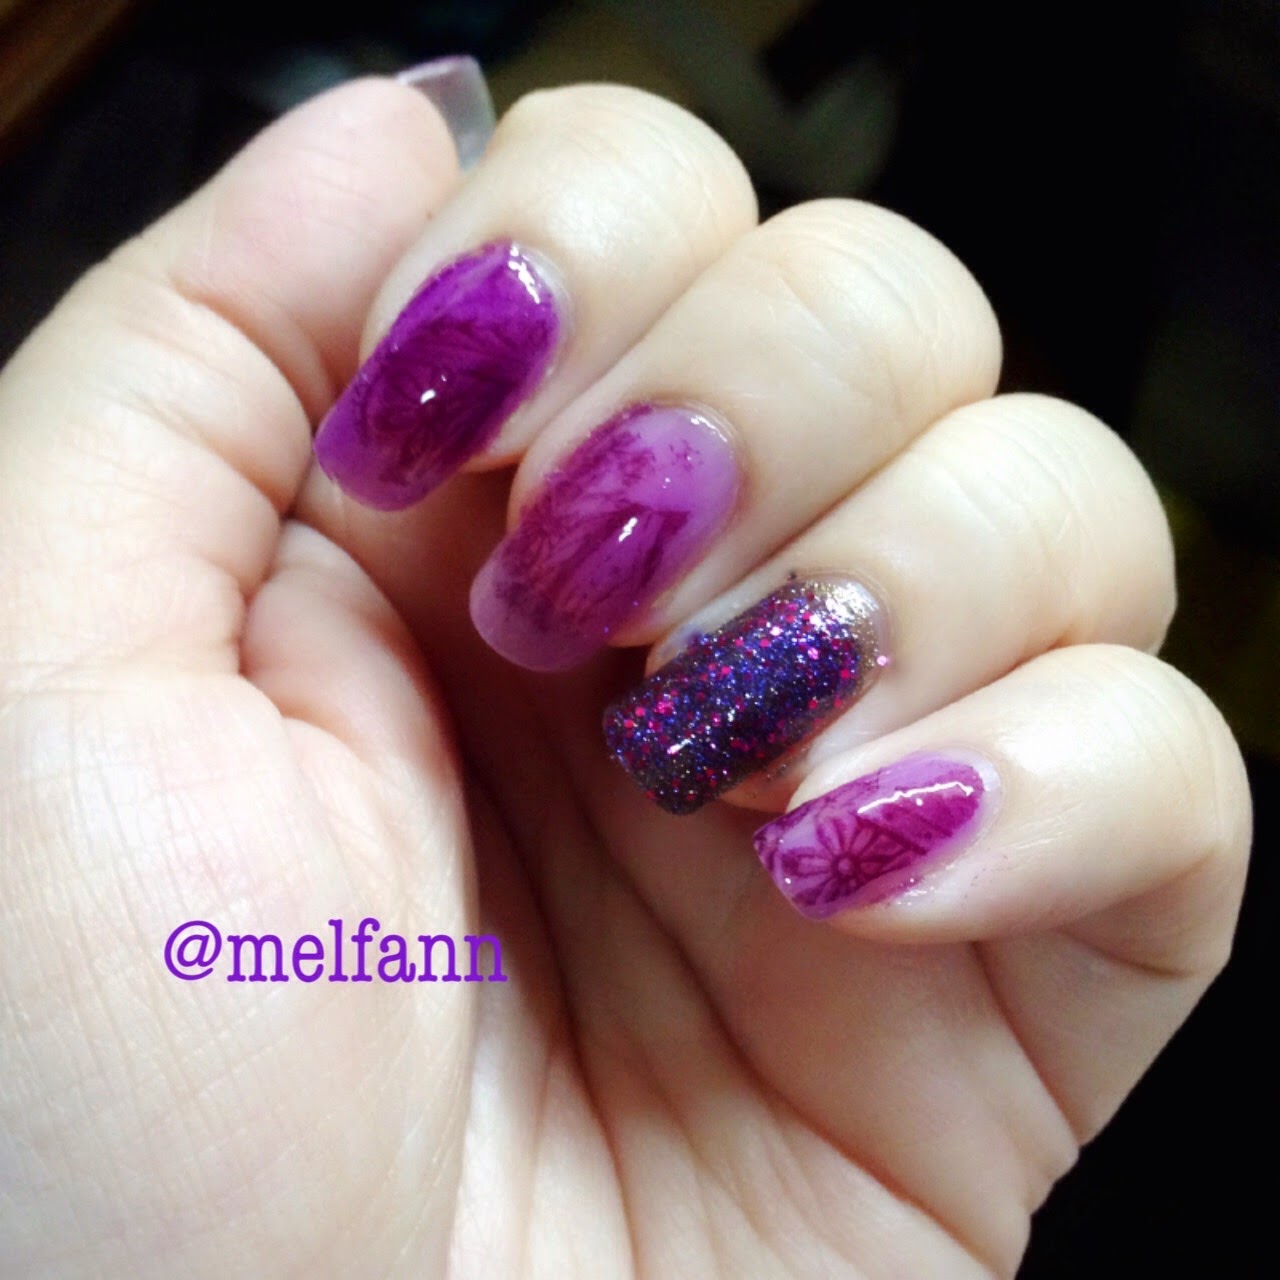
I finally gave in to temptation and bought OPI's Sheer Tint in purple just so as to try out this design. The base colour of all my nails, except for the ring finger, was done with the Sheer Tint before I did a lace stamp in Plum. Unfortunately, my stamp didn't cooperate with me today and resulted in the very sketchy floral pattern that you see above.

For the accent ring finger, I used OPI's Sand in Gold before topping that off with that blue purple glitter by Ciate. This design is inspired by +elleandish // Janelle 's Sultry Smoky Lace Nails. Hers obviously looks way better than mine.
First set of nails for the week! I let my nails rest over the first week of 2015 because I haven't really been doing so. For this design, I used Ciate's Pepperminty as the base and for the 1st stamp, I used white nail polish on Konad stamp m60 (criss cross) followed by black nail polish on Konad stamp m74. I carried on the black and white/silver theme onto the glitter accent nail. For the glitter, I used Ciate's Humbug and I really like how it has small black glitter together with larger silver ones.

If you like a different look, you can switch up the base to another pastel colour but keep the stamping colours to white and black. I chose a floral top stamp but you can always layer something else.

If you use a pastel pink as a base, you might want the accent nail to be a full gold glitter.
Hi folks! It's a little bit late but here's my video of all the nail art that I've done in 2014 in a short video clip :)

Enjoy!


By the way, I've also uploaded the previous years nail design videos too!

It's going to be 2015 and to celebrate that fact, my nails for this week are extra bling bling! I used OPI's "Shine For Me" on my thumb, index and pinky and in 3 coats so that it's opaque. If you do not want to put on so many coats (removing glitter can be a bit of a b**ch), use a silver polish as a base before applying your glitter nail polish.

For the middle and ring finger, I used The FaceShop's white and then let it dry completely before adding the glitter 'tail' of the shooting stars with a brush. Once that is semi dry, I added the crystal studs but do use silver star studs if you have them. As you can see from my ring finger, I used 2 crystals of different sizes and I found that this made it more interesting instead of using 2 similar sized ones.

What are your countdown plans? I currently have none except to have a hotpot dinner with my parents on the eve and I'll probably play with some sparklers by myself while downing a couple glasses of champagne. Horribly mundane, I know. Alas, friends of mine whom I used to spend NYE with are now busy with their own plans or they can't countdown due to the children. Nonetheless, I'm looking forward to 2015 as it can't be worse than 2014. Cheers people!
Was inspired by 3 different nail designs by others and decided to do a combination of what I liked into this week's design. As the base, I used Sally Hansen's Miracle Gel 'Birthday Suit 110' for 8 fingers.

Thumb: use 2 pieces of tape to tape up a triangle. I then painted on Sally Hansen Miracle Gel 'Game of Chromes'. Remember to lift the tape up immediately after painting the triangle on because you do not want it to lift up with some crumbling dried polish. Then, I used a star sticker at the top but this would look even better if you have a star shaped 'crystal' or whatever it's called. Sorry. Having a mental block.

Middle Finger: I used my favourite white nail pen from The FaceShop and the trick is to draw that cross where you want to paint the red ribbon with this white paint FIRST. This anchors the design so that you know where to start the triangles and then the scallops above. I then used my Chanel 'Red Dragon' to paint on the ribbon with a fine tipped brush. Wait for this to dry for a VERY long time before putting on the top coat.

Ring Finger: The base is OPI but you can use any plum coloured base. I chose plum because it matches the nude base of the other fingers but you can choose any dark base. The 'ball' was drawn by simply dabbing the glitter nail polish (choose your favourite colour) onto the nail like you would with a dotting tool. I then drew on the bow and hanging ribbon with a brush, using the Sally Hansen Miracle Gel 'Game of Chromes' but you can use any flat gold polish.

I like how this is simple but yet really Christmasy in a different way (no Santa Clauses/ Reindeers...or gingerbread men...)! You can check out the original inspirations here:


This design actually looks better with a white base rather than a silver base but I JUST wanted to use my silver polish and I realised that metallic colours are really hard to capture with a phone camera. Oh well. Anyway, yours truly hand painted the leaves of the holly with a small brush. It didn't quite turn out the way I had originally wanted them to but I only have my lazy self to blame. I should've washed my brush prior but alas, my laziness caused me to have to use a hardened brush. Oops. Haha. Anyway, this is my 2nd Christmas themed nails for the month of December! Now, what should I do for next week and for the actual Christmas week? I need inspiration babes!!
It's December so the Christmas themed nails are going to come out! I decided to use this opportunity to try out Sally Hansen's latest Miracle Gel series which is supposed to last a lot longer than normal polishes and it does not require any UV/ LED lamps to cure the nails! Moreover, the instructions state that two coats of colour are needed before topping it off with their Top Coat to 'cure' and seal in the colours.

In my above design, I used Birthday Suit 110 (the beige one) as well as the gold Game of Chromes 510 while the white snowflakes were drawn with The FaceShop's white nail art pen.

First thing that I noticed about Sally Hansen's Miracle Gel polish was the brush head. Not sure whether you can see it clearly from the photo above but the brush head is round, unlike the usual straight bottom ones. This makes a HUGE difference when you're painting your nails near the cuticles because it curves to the round shape of your cuticles! Now...why didn't anyone think of doing this earlier? As you can tell, I was already super happy with this superior polish brush and needless to say, this is one of the few times where my polish did not have any weird smudges on my cuticles.

Secondly, the instructions state that you need not put on any base coat and I was a little sceptical when I read this. However, it continued to surprise me because it did even out a bit of the nail ridges. Ok Sally Hansen, you've won another brownie point.

Now, onto the colours. I was not very impressed with Birthday Suit 110 because it was a bit of a trial and error trying to get the opaque beige polish onto my nails on the second coat. It felt as if the first coat became tacky really quick and that I should've waited for it to dry completely before putting on the second coat. For Game of Chromes 510 however, I was thoroughly impressed! I was expecting it to come of a little less glittery/chrome but it did! On the first coat! The second coat merely made the colour more metallic and pronounced. So happy with this because it's EXACTLY what I was looking and hoping for!

Now I know why the polishes are flying off the shelves. I highly recommend buying their colour + top coat set (S$16.90) because it is essentially buying 1 and getting 1 free. Their normal colours in this series cost S$16/bottle and is their most expensive range. You can find them in Guardian, Watson's and John Little (where I bought mine) but no guarantee on stock.

It has been 3 days since I've polished my nails and I normally redo my nails every week due to paint chipping so let's see whether this design will last longer than my usual 1 week!

Update as of 12 Dec 2014:
I am thoroughly impressed. It has been more than a week (I did my nails on 4 Dec) and there isn't any chipping of the paint! Also, it seems to be preventing my infamous third fingernail on my right hand from peeling and breaking. Now I feel less compelled to remove the design off to put on a new one. But...I also want to change the design on my nails. Decisions, decisions.

Anyway, conclusion is this - if you like your nail polish to last really long without paying exorbitant prices, go get Sally Hansen's Miracle Gel series. It's worth the money.
I'm finally on Pinterest and if you'd like a more organised 'board' of my posts on my nail art plus my recipes, do follow me there at http://www.pinterest.com/themelissafann/.

Besides those 2 boards, do give me suggestions on what other boards I should put up as I'd love to hear from you guys. Big thanks in advance for the follow!
I caved in and bought a bottle of Matte Top Coat from OPI the other day because I just wanted to try out this contrasting nail art between matte and glossy. To me, this adds in another dimension of texture and contrast while being relatively simple and classy.

So for the above, I used:
Ciate          Peppermint
Innisfree    #23
OPI            Matte Top Coat

I applied alternate nails with Ciate Peppermint and Innisfree #23. After which I then added the matte top coat. I found that the matte top coat dries really fast! Now, with a thin brush, dip it into the normal polish (Ciate Peppermint on the Innisfree #23 base and vice versa) and draw on the squiggles. Following +Robin Moses Nail Art - Nail Art Tutorials, Nail Art Designs, Nail Art Ideas, DIY, Easy Nails, I drew full squiggles only on my ring finger to make it an accent nail while the rest had the squiggle only at the bottom.

To make the squiggles more shiny, I added another layer of shiny top coat only on them. The contrast isn't very clear in the photo but it's ok because I like the subtle contrast. It reminds me of the Spot UV printing on catalogues.

Know any more designs and want me to try them out? Drop me a message in my chat box!
I really shouldn't. But I did. I couldn't resist buying this limited edition Hello Kitty 40th Anniversary nail set (S$40) when I went to Sephora after work. I had an extra 20% discount thanks to my Black Sephora card, which really helped to push me into grabbing this for myself. Although I went into Sephora purely to find nice gift items for Christmas.

See the crystals just below the nail file? Those aren't simple crystals. They're Hello Kitty crystals! Each crystal is in the shape of Kitty-chan! The red ones? Apples!

How cute is the tin can that all the nail stuff was placed in? Gah...I'm such a sucker for cute things. There are other limited edition Hello Kitty cosmetic sets but I already have a lot of lip glosses and eye shadows, and unlike nail polishes, you don't really need that many of those. To me at least. I can't wait to use the stuff from this box but I'll have to wait because I broke 2 nails this week :(

I decided to try out this design which kinda reminds me of Blue and White porcelain. My colleague asked me whether I used correction fluid to draw the design, to which I gave her this expression: (-_-).

The answer is NO. I used a white nail art pen from The FaceShop, which is really one of the best tools when it comes to nail art because using a brush can be a real pain some times. However, I do need to be a little more patient and let the paint dry a lot longer than the polish before sealing it with a topcoat.
Instead of going for the usual Halloween designs, I decided to go for fall colours as inspired by +Robin Moses Nail Art | Nail Art Tutorials, Nail Art Designs | Nail Art Ideas, DIY, Easy Nails. This is actually the touched up version because for the first attempt, I used my old bottle of Sally Hansen Violet Plum nail polish and it was starting to thicken, which resulted in a very blotchy finish with lots of bubbles. Same thing for my Sally Hansen Extra Shine Top Coat. Thus, I splurged on OPI Berrylicious and Rimmel London Top Coat.

A lot of people ask me whether these are my real nails and for the thousandth time, yes they are! I broke my index finger's nail about 2 weeks ago and it hasn't grown out yet so you can see clearly how much shorter it is compared to my other nails.

I have a feeling that this design will last a bit longer than the other designs that I've done so who knows, they may not be the "nails for the week" but "nails for the bi-week"?

Disclaimer

All views presented on this blog are based on personal opinions and experiences with no monetary compensation was received unless otherwise stated.

My Polyvore Sets


http://emailcashpro.com